Installing synthetic grass is a great way to achieve a lush, low-maintenance lawn. However, to ensure durability and a polished appearance, installing proper borders is essential. Borders keep your synthetic grass in place and prevent the edges from lifting over time. Here’s a comprehensive guide on how to install borders for synthetic grass.
Materials Needed:
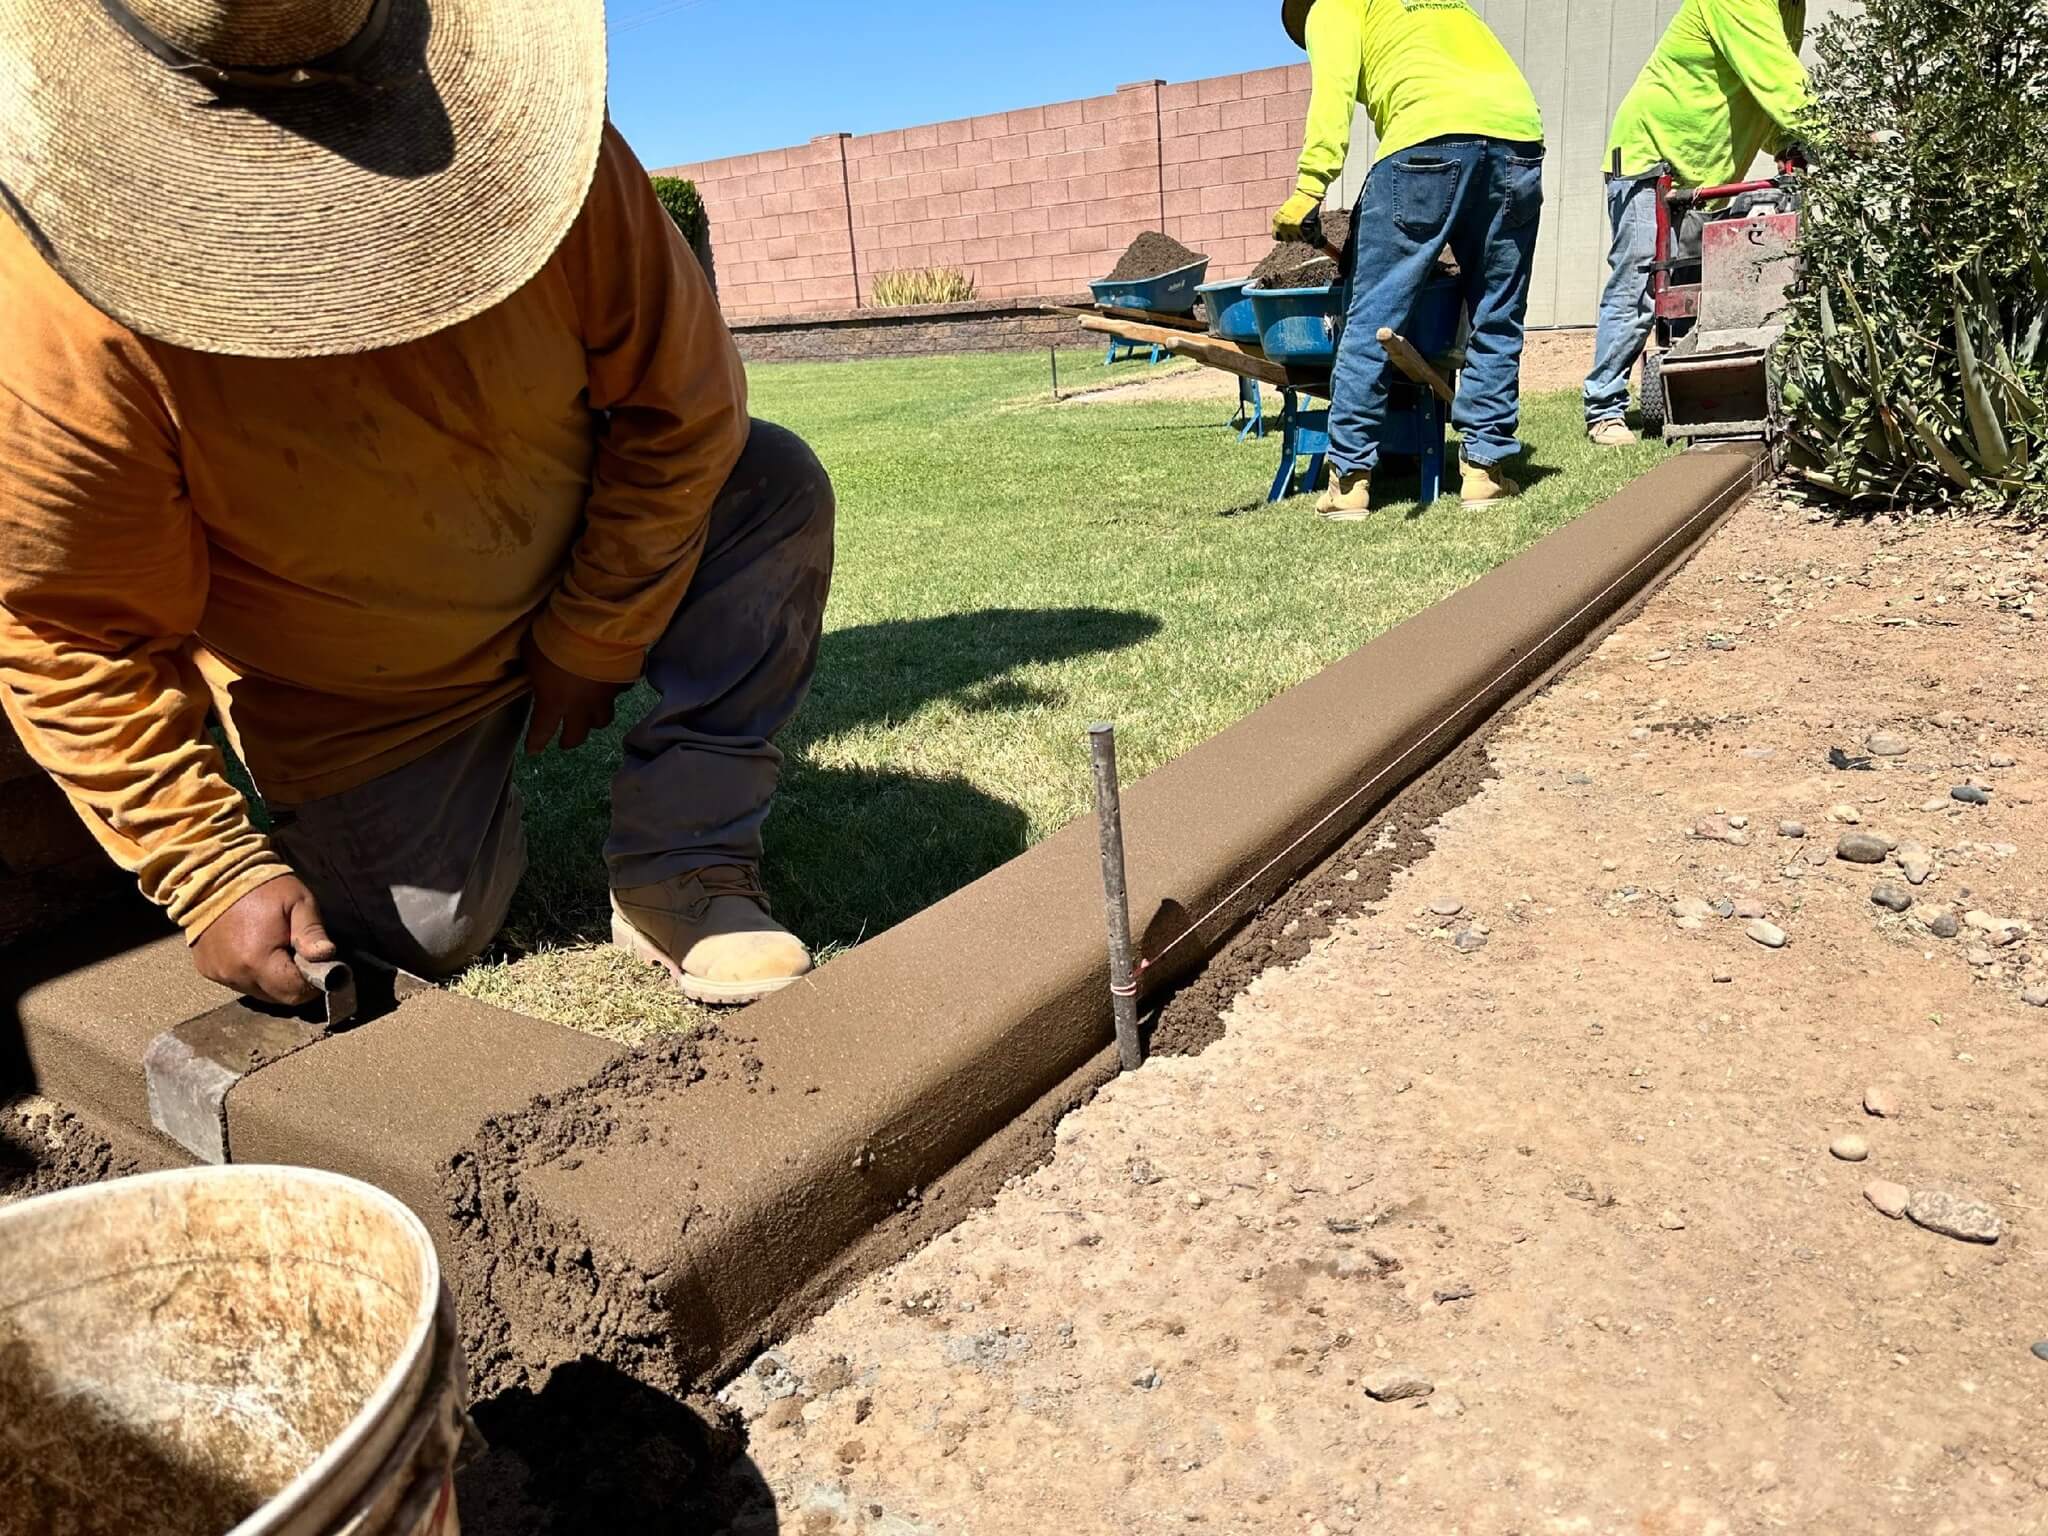
- Landscape timber, plastic bender board, metal edging, or concrete curbing
- Stakes or nails
- Screws (if using wooden borders)
- Power drill
- Hammer or mallet
- Measuring tape
- Shovel
- Level
- Landscaping fabric (optional)
- Gravel or crushed rock base (if applicable)
- Spade or edger
Step 1: Plan and Prepare
- Define the Area: Measure and mark the perimeter of the synthetic grass installation area. Use stakes and string to outline the edges clearly.
- Choose Your Border Material: Select a border material that suits your landscape design and functional needs. For instance:
- Plastic bender board is flexible and ideal for curved edges.
- Wooden borders offer a classic look but may require treatment to resist rot.
- Metal edging provides a sleek, modern finish.
- Concrete curbing is durable and permanent.
- Prepare the Ground: Clear the area of debris, rocks, and weeds. Dig a shallow trench around the perimeter where the border will be installed. The trench depth depends on the height of your chosen border material.
Step 2: Install the Border
- Position the Border Material: Place your border material into the trench, ensuring it aligns with the desired shape of your synthetic grass area. For curves, flexible materials like plastic bender board work best.
- Secure the Border:
- For plastic or metal edging, drive stakes or nails through the pre-drilled holes into the ground at regular intervals.
- For wooden borders, use a power drill to secure screws into corner joints. Use stakes to anchor the wood firmly in place.
- For concrete curbing, you may need to hire a professional to pour and set the concrete.
- Check the Level: Use a level to ensure the border material is even and sits at the correct height relative to the surrounding ground. Adjust as needed.
Step 3: Backfill and Reinforce
- Backfill the Trench: Fill the trench with soil, gravel, or crushed rock to hold the border securely in place. Compact the material firmly to eliminate gaps.
- Add Landscaping Fabric: Lay down landscaping fabric over the base to prevent weed growth. Extend it up to the edge of the border for a clean installation.
Step 4: Install the Synthetic Grass
- Lay the Turf: Roll out the synthetic grass over the prepared area, ensuring the edges align with the borders. Trim any excess material with a utility knife.
- Secure the Grass: Use landscaping nails or staples to fasten the edges of the turf to the ground. Space them every 6-8 inches for a secure fit.
- Finish the Edges: Tuck the edges of the turf beneath the border for a seamless look. For certain borders, you can use adhesive to bond the grass to the edging.
Tips for Success:
- Ensure proper drainage to prevent water from pooling around the borders.
- Choose UV-resistant and weatherproof border materials for longevity.
- Double-check the alignment of the borders before finalizing the installation.
By following these steps, you’ll create a sturdy and attractive frame for your synthetic grass installation. A well-installed border enhances the aesthetic appeal and functionality of your artificial lawn, ensuring it stays in top condition for years to come.